Robot Rumble 2024
Combat robot competition arranged by Bergen Fellesverksted
Introduction
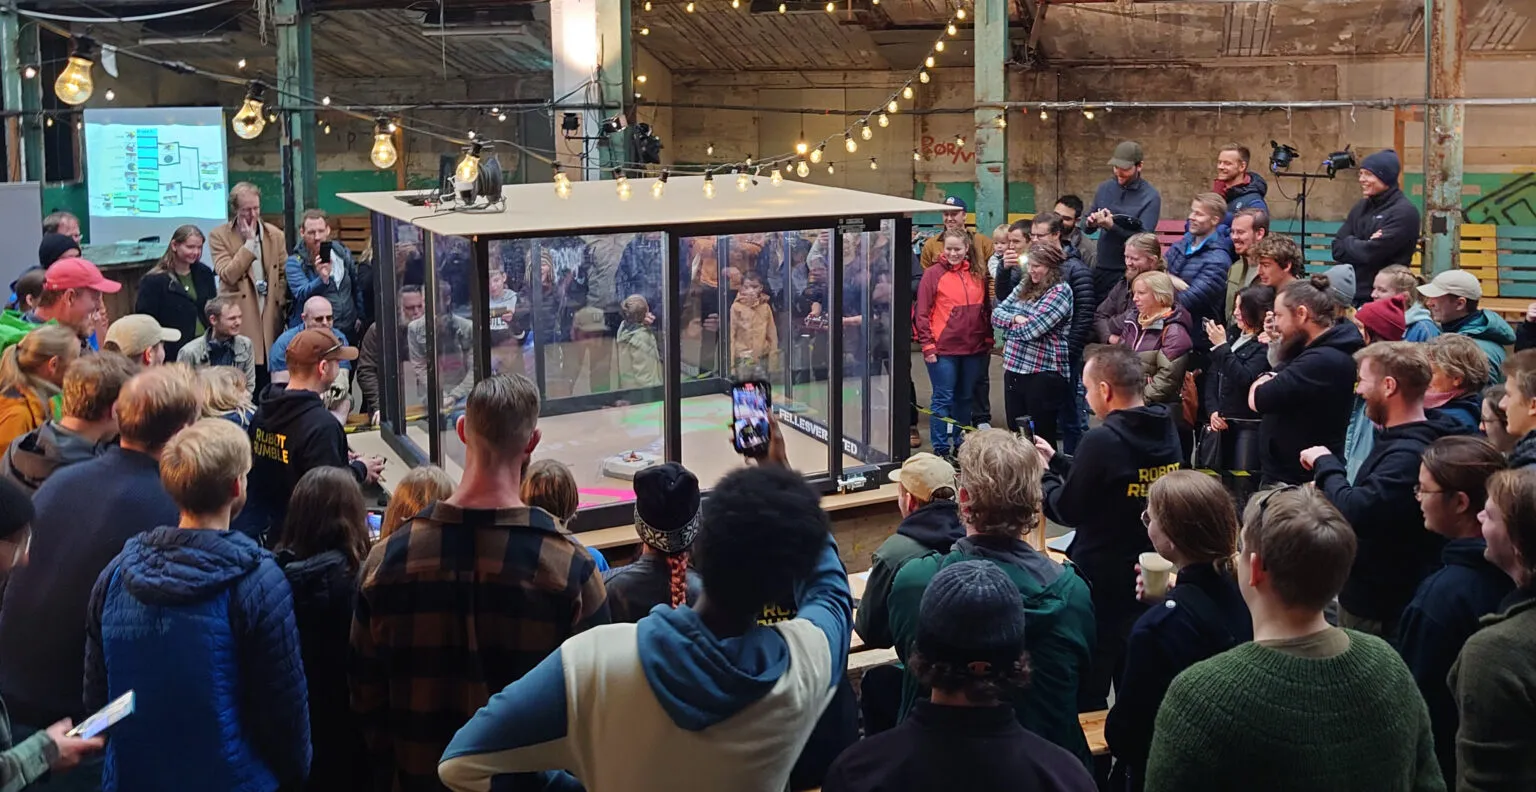
Robot Rumble 2024 was the first (annual?) combat robot competition arranged by Bergen Fellesverksted.
One of my classmates who was a regular at the workshop invited me to join in. I was hesititant at first, considering the amount of courses I had signed up for in our elective semester, but was reassured that I could join work on his robot, and so it began.
Robot Rumble 2024 was the first combat robot competition arranged by Bergen Fellesverksted. A classmate who regularly worked there invited me to participate. I was initially hesitant due to a heavy elective course load, but joined after he suggested I could contribute to his robot.
Rules
The first step was to get familiar with the rules of the competition. They were based on the American Ant-weight class of robots, with a limit of 1lb/454g (not to be confused with the British Ant-weight class of 150g). The complete set of rules for the event can be found here, but the main considerations boil down to robot and weapon limitations.
Robot rules:
- Must weigh 454g or less
- Must fit through arena door, 61x61 cm
- Batteries must not exceed a maximum of 24 volts (nominal).
- Only all electric systems allowed.
Disallowed weapon types:
- Weapons designed to cause invisible damage.
- Fluid based weapons
- Glue or sticky pad weapons
- String or entanglement weapons
- Heat and Flame based weapons
- The use of electricity as a weapon
- Explosive weapons
- Weapons that may shatter
- Magnetic/inductive systems
Exploration
Weapons
Early work focused on selecting a weapon system and overall design. Hammer and crusher concepts were dismissed due to high power and weight requirements. Flippers were considered for their simplicity, but we wanted a more aggressive approach.
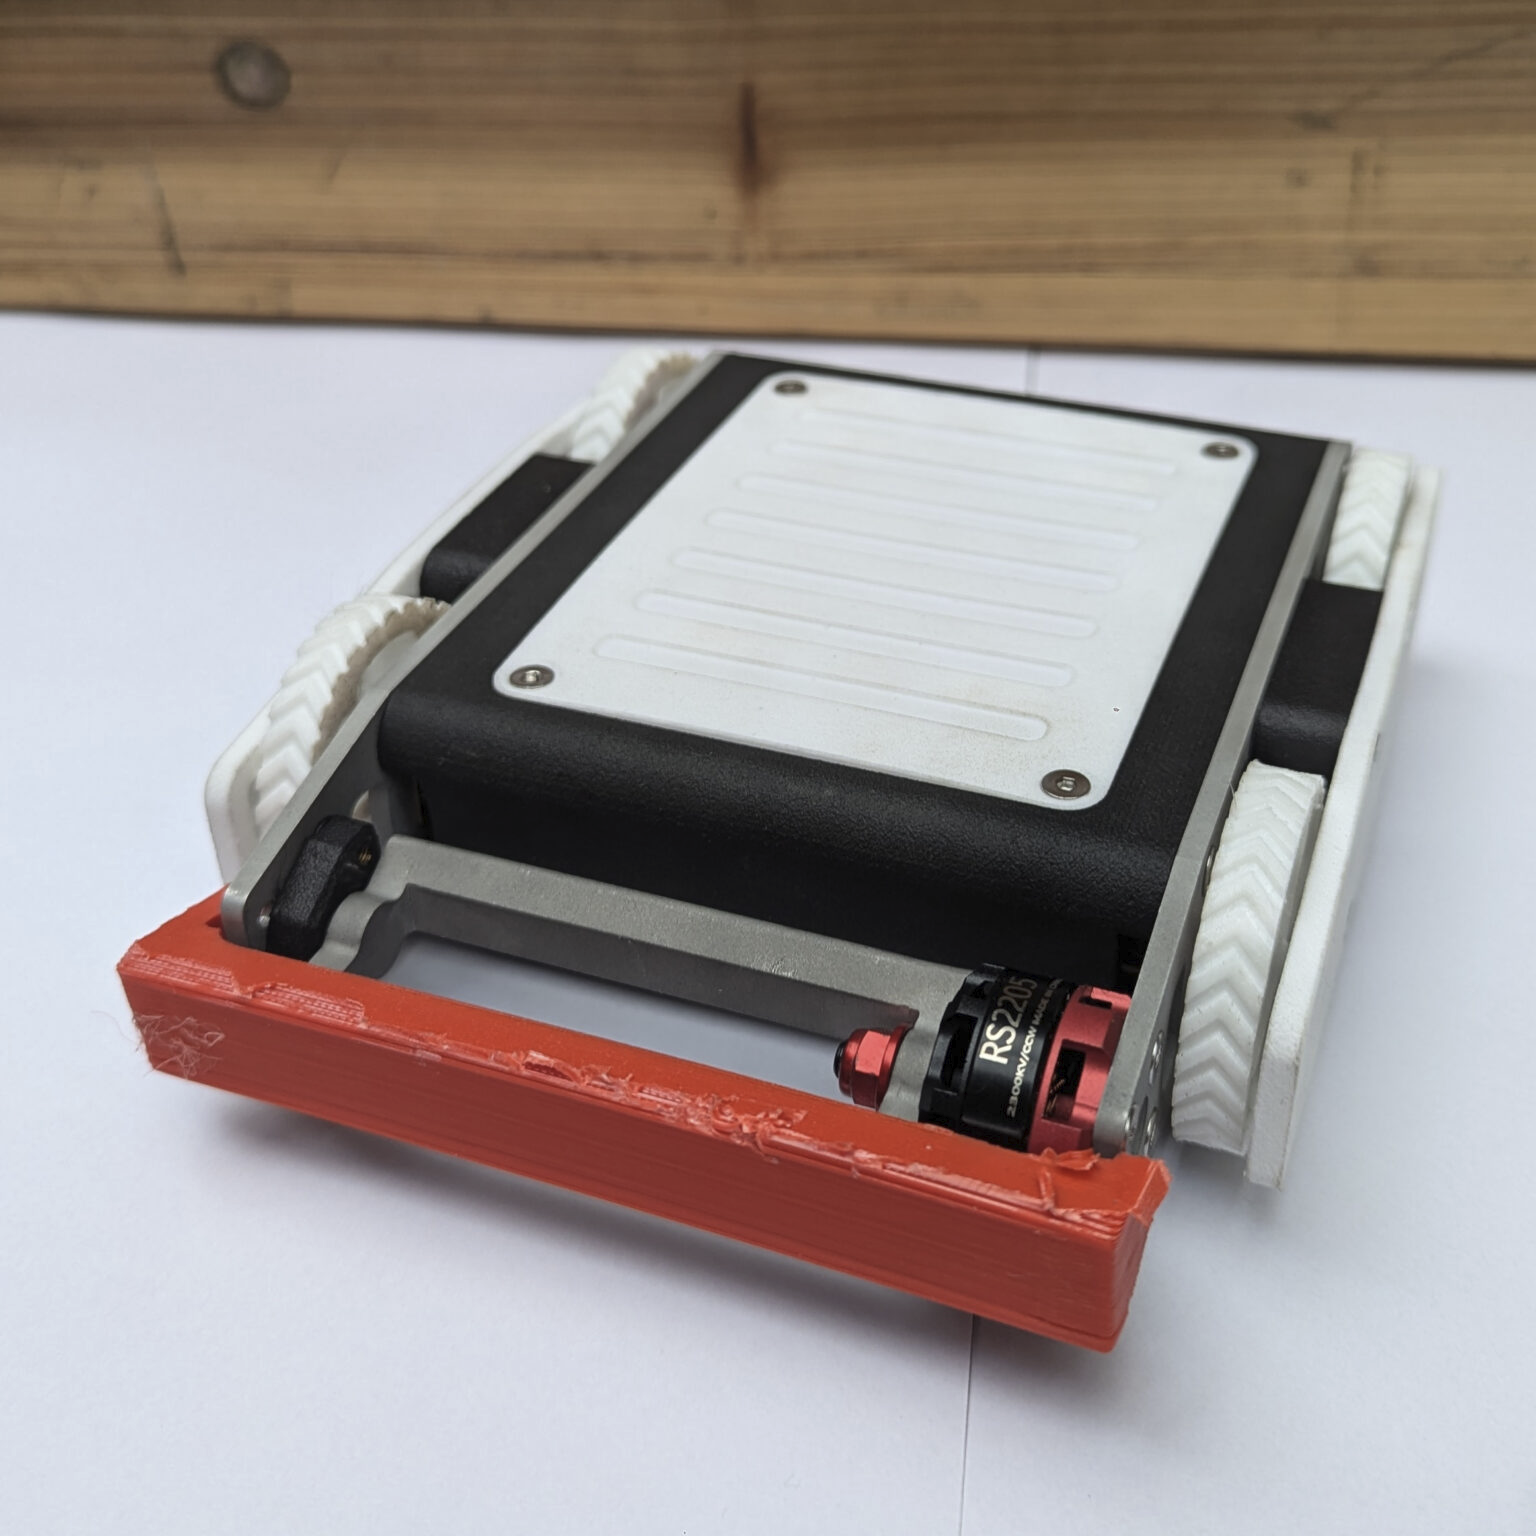
We chose a spinner, which stores energy as angular momentum before impact. A vertical spinner was considered, but recovering from being flipped seemed unreliable. Instead, we settled on a front-mounted drum spinner, which simplified both weapon design and inverted operation.
Movement
To avoid being disabled when flipped, we designed the robot to drive in either orientation by extending the wheels above and below the chassis. A four-wheel drive setup was chosen for increased torque and redundancy if a wheel failed.
Design
- Summarize the final robot concept and the main design goals.
- Explain key trade-offs (weight, durability, weapon power, maneuverability).
- Include one overview render or sketch of the full robot layout.
CAD and Prototyping
- Describe the CAD workflow and tools used.
- Note major prototype iterations and what changed between versions.
- Add quick comparisons between early and final geometry.
Chassis
- Explain chassis shape, wheel placement, and self-righting/inverted driving strategy.
- Document mounting points for motors, battery, receiver, and weapon system.
- Mention where failures or weak spots appeared and how they were reinforced.
Drum and Weapon Mount
- Describe drum dimensions, mass distribution, and shaft/bearing setup.
- Explain how weapon motor power was transferred to the drum.
- Document balancing, vibration issues, and fixes.
Material Choices
- List selected materials for frame, armor, drum, and fasteners.
- Explain why each material was chosen under weight and impact constraints.
- Note any parts that were replaced after testing.
Electronics and Control
- Provide a block-level overview of the electrical architecture.
- Explain signal flow from transmitter to drive and weapon systems.
- Include one wiring diagram or annotated photo.
Motor and ESC Selection
- Record chosen drive and weapon motors, including key specs.
- Explain ESC choices and compatibility considerations.
- Mention expected vs measured performance.
Receiver and Wiring Layout
- Show channel mapping and failsafe configuration.
- Explain cable routing strategy to avoid interference and damage.
- Note connectors used and why.
Battery Strategy and Safety
- Document battery chemistry, capacity, C-rating, and expected runtime.
- Explain placement and mounting for safety during impacts.
- Include charging, storage, and pre-match safety checklist.
Manufacturing
- Outline which parts were printed, machined, or bought off the shelf.
- Mention lead times, bottlenecks, and last-minute manufacturing decisions.
- Add a quick bill-of-materials summary.
3D Printing Settings and Iterations
- Record filament type, nozzle, layer height, infill, and wall count.
- Note print failures and tuning changes that improved part reliability.
- Identify which parts were optimized for speed vs strength.
Assembly Process
- Describe the assembly order and required tools.
- Highlight alignment steps that were critical for reliable operation.
- List recurring issues during assembly and how they were solved.
Testing and Tuning
- Summarize test plan before competition.
- Document metrics tracked (speed, spin-up time, current draw, reliability).
- Include the biggest changes that came out of testing.
Bench Tests
- Cover static tests for drive, weapon, and electronics.
- Note thermal behavior and battery sag under load.
- Include safety setup used during spin tests.
Drive and Weapon Tuning
- Describe controller tuning (expo, rates, mixing, throttle limits).
- Explain changes to gearing/pulleys or wheel setup.
- Note final tuning values used on competition day.
Competition Day
- Describe event setup, check-in, and robot inspections.
- Summarize match strategy and between-match maintenance.
- Add overall ranking and final result.
Match Log
- Add one short entry per match: opponent, outcome, and key moments.
- Note major damage taken/dealt and repairs between rounds.
- Include lessons from each match that informed later decisions.
What Worked / What Failed
- List the most successful design decisions.
- List the biggest failure points and root causes.
- Prioritize fixes by expected impact for the next version.
Future Improvements
- Summarize top priorities for the next build.
- Group improvements into mechanical, electrical, and strategy categories.
- Estimate effort and risk for each proposed change.
Version 2 Ideas
- Capture concrete V2 concepts with rough sketches or descriptions.
- Highlight expected gains and potential trade-offs per concept.
- Mark which ideas are realistic before the next event.
Rules-Informed Upgrades
- Identify rule constraints that limited the current design.
- Propose upgrades that maximize performance while staying compliant.
- Include a quick compliance checklist for future iterations.
Lessons Learned
- Reflect on what you would do differently from day one.
- Capture both technical and teamwork/project-management lessons.
- End with the most important takeaway from the project.